
Written by Linda aka MadLinDesigns on June 9, 2008.
© MadLinDesigns
This Tutorial was written from my own ideas any resemblance to other tutorials
is purely coincidental.
You may use this tutorial for personal use only. Do not Distribute in other groups,
post on a website or send in email without express permission of me.
.
Please DO NOT script my tutorial.
------------------------------------------------------------------------------
Supplies Needed
Paint Shop Pro – I used PSPX but with slight alterations
the same results could probably be achieved in other
versions.
You can download a demo of the latest version here
A tube of your choice to fill your jar or download mine here
Notes:
All settings remain the same unless otherwise stated
This Tutorial assumes you have a working knowledge of PSP
OK…got everything, are you ready? Then let's get started!
Please be sure to save often as a psp file, doing this ensures that if your
Computer crashes or PSP freezes you won’t have to start from scratch.
1.
Open a new transparent image with the dimensions 600x600 pixel
Resolution 300 dpi
File – New – ( Ctrl+N )

This gives us enough room to work with, we can crop later
2.
In your Materials Palette close the foreground Color
And choose white for your background Color

Select your preset tool (P)
Rounded Rectangle – Anti Alias Checked – Create as Vector checked
Solid line style – width 8,00

These are my settings and are only a guide, please feel free to experiment
with your own settings
3.
From x100 y200
(the size is your choice)
To x385 y 585
draw a rectangle
Objects - Align – Horiz.Center in Canvas
Convert to Raster layer
Layers – Convert to Raster Layer
4.
Still using the preset shape tool, rounded rectangle
Draw another rectangle, a little bit smaller in width
and height,
Objects – Align – Horiz.Center in Canvas
Convert to Raster layer
Layers – Convert to Raster Layer
5.
Move into position so that it looks something like this
I have filled my bottom layer with a light grey
This makes it easier for you to see what it is supposed to look like

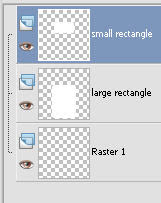
You should have 3 layers
the bottom layer, which should be empty
the middle layer with your larger rectangle
and the top layer with your smaller rectangle
6.
Close the bottom layer
Layers – Merge – Merge Visible
Selections – Select all – Float – Defloat
Layers – New Raster Layer
Effects – 3D Effects – Cutout

Layers – New Raster Layer
Repeat the Cutout with Horizontal –21 (minus)
Deselect
Selections - Select None
7.
On your large rectangle layer, lower the opacity to about 45
Again these settings are only a guide
Feel free to experiment with your own settings
Layers – Merge – Merge Visible
We now should have something looking like this
8.
Select your preset tool (P)
Rounded Rectangle – Anti Alias Checked – Create as Vector checked
Solid line style – width 8,00

Draw a rectangle, about the same width
As your jar, when you are pleased with the size
Objects - Align – Horiz.Center in Canvas
Convert to Raster layer
Layers – Convert to Raster Layer
9.
Move your rectangle a little up so that it looks like the
Cap is sitting tightly on your Jar and a little of the jar neck
Is showing, like this

Selections – Select All - Float - Defloat
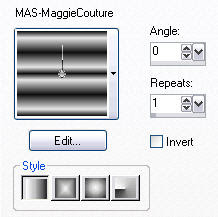
In the materials Palette change your foreground color
To a gradient of your choice,
(remembering if you want to save as a template to choose a gradient
that you can colorize easily.)
With your flood fill tool, fill selection.
Do not Deselect
10.
Layers – New Raster Layer
Effects – 3D Effects – Cutout
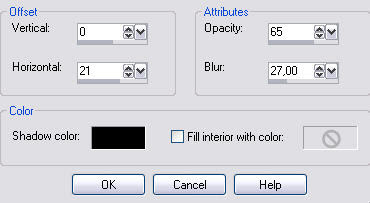
Layers – New Raster Layer
Repeat the Cutout with Horizontal –21 (minus)
Deselect
Selections - Select None
11.
Adding a reflection or highlight on your Jar.
Activate your jar layer, this is the second layer
Layers – New Raster Layer
With the selection tool, rounded rectangle

Draw a selection, on the left side of the jar about 80 width and 375 height
Flood fill with white, select none
Selections – Select None
12.
Adjust – Blur – Gaussian Blur

move a little more over to the left.
And in the layer palette lower the opacity to about 80
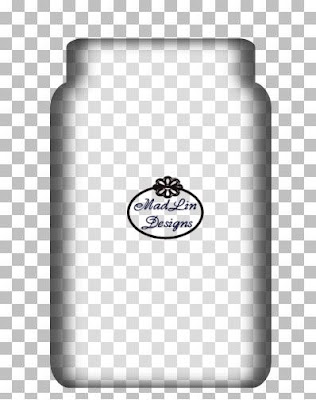
13.
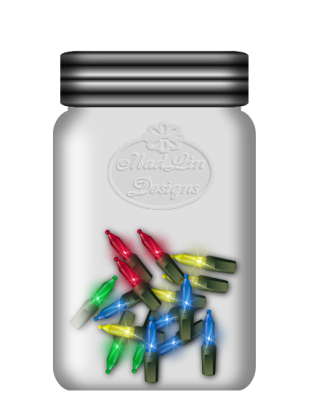
That’s it, you’ve made your first mason jar and now
Should have something looking like this
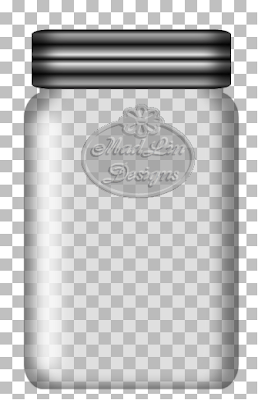
To preserve the layers save as a PSD file,
Save as and choose PSD from the dropdown menu
Using this method enables all programs to open and use the files.
Some designers prefer the PNG file option to save
But here you have to save each layer separately and they cannot
be opened by all programs.
Use the following settings if saving as a PNG file
File export – PNG Optimizer
Colors:
check 16,7 million Colors (24bit)
Transparency:
Check Alpha Channel Transparency
Existing image or layer transparency
Leave the other tabs alone.
Click ok, name it and save in a folder of your choice
----------------------------------------------------------------------------------
Thanks for trying my Tutorial,
I hope you have enjoyed creating this with me.
If you have any comments or questions, please email me here.
-----------------------------------------------------------------------------------
Filling your Mason Jar:
To fill your finished jar, duplicate the jar layer
Layers – Duplicate
Highlight the bottom Jar layer
Layers – New Raster Layer
(This layer should be between the two jar layers)
You can then fill with whatever you please
I also lowered the opacity of my jar layers and
Set the blend mode to soft light, but this
Is just a personal touch.
Merge visible if wished
Copyright © 2008
Linda aka MadLin - MadLinDesigns
All Rights Reserved


2 comments:
Aww your blog is sooo cute!
huggs
Angela
Wonderful. Thank you so much for this tutorial, tube and gradient. Have look for something like this but haven´t found anyone.
Post a Comment